Why just write at home?
Sometimes my projects can get a little beyond my skill and ability. I pride myself on my lateral thinking and problem solving capacity. But like everyone, I sometimes can get locked into an intellectual box that I just can't find my way out of. In times like this, it is best to just stop what you are doing and pack it up. Coming back to a problem with a fresh attitude and set of eyes can often help. Forcing things in situations like this, can often just see you doing further damage and while increasing your stress.
One of these 'boxed up' projects has been slumbering in my cupboard since last year. That is, until just recently when I awoke to an email from the 3D printer, Shapeways, telling me that someone had ordered one of my carriage levers.
It was Mike over at Clickthing, who had just purchased a beautiful Remington Noiseless - as seen
here.
The trouble was that while I had designed this part with considerable effort, and even installed it into my own machine, I had yet to actually get the typewriter working. A couple of big issues had stood in my way last year, and I more or less had relegated the machine to the back of the cupboard.
Mike has also had to confront some of the these same problems as well. Not only did he have a broken lever, but he also
discovered that the drawband for the mainspring was also shot - and very difficult to replace.
With Michael Clemens rapidly making progress on his machine, I thought I had better get off my arse and perhaps finish my own. So I busted it out of the cupboard, slapped it on my desk, and tried to ignore the collective half dozen or so hours I had burned trying to get it going in the past.
And, within an hour or so I had the machine mostly working. Much to my surprise.
Let's talk about the lever.For those who haven't seen my previous blog about producing this part,
here it is.
I wish I had my own 3D printer - even just one that does plastic, so I could have done a couple of cheap prototypes before I printed the main product. Instead, while the lever was quite cheap to print, posting to Australia turned out to be hideously expensive, so I just did the best I could with the design and produced the main.
As such there were a few things about the design that I only learned were wrong when I had it bolted into the machine. There's no fatal errors in my design that makes it unusable, but the design could still do with a revision.
Firstly, as mentioned before the part needs to be drilled out to be usable. No big deal, and it gives the hole a better fit anyway. But it is something that I can fix with a re-design.
Secondly, the angle of the lever is a fraction out. Coupled with a curve that the original didn't have, it means that the lever can knock on the side of the paper when you use it. It wouldn't have been a problem if this machine wasn't designed in a way - that it had the paper sticking up and out of the typewriter at an absurd angle. This was easily rectified by just shifting the paper locator across to the right a bit. No big deal, but I could have done better. Then again, so could have Remington. In the next version of this machine they put in a proper paper table that didn't have the paper jutting out into the air stupidly, and in the way of the lever.
My understanding is that even with the original lever, this posed something of a problem.
Third: I needed to put a chamfer onto the edge of the tiny square knob that slots into the machine. This can be easily filed into it, as it only needs to be small. But without it, when you unfold the lever for use, it occasionally catches on a small metal piece that it should just slide over. All you need to do is push the lever a little bit towards the back of the machine (don't worry, it is made to do this) and just move it past the obstruction.
No big deal, but Michael may need to be mindful about this when his turns up. Eventually I'll revise the design.
Let's talk about mainsprings. Like Michael, I had a broken drawband.
Michael, for the record, you cannot.... I repeat, cannot... Simply tie a new string to a piece of the old one. Why? Because the lumpy knob brushes and catches on parts in the typewriter. Cut your loses, and cut that string and get rid of as much of it as you can.
And while you're cutting - on the side of the drum with that biggest lip, cut yourself an angled grove like the one in the photo above. This is similar to how the drum on the portable Royal typewriter of this era is set up, and it works perfectly.
Just knot your line, and slip the string into the grove. Have the knot facing outwards of the drum on the flat side, and wrap your string onto it. Be careful when winding the spring though, as you might catch your finger on this grove if you accidentally let the drum slip while winding. I made sure that I had enough string on the line to wrap around the drum at least once, with the carriage fully extended along its tracks.
Now. Let's talk about Rollers.One of the biggest problems that stopped me in my tracks last time, were the crystallized rollers. These were fossilized to the point that the hardened rubber inside of the cracks sparkled in the light. They had flats-pots, cavernous cracks and hardness that was almost diamond like. Suffice to say, they were pretty freakin' useless. The platen was also as slippery as a cockney con-man.
The platen was easy to resolve as it hadn't cracked, and it at least still sort of felt like rubber. I just rubbed horizontally across it once with a piece of course sandpaper, which gave it plenty of traction.
However the rollers were quite different.... but.... have a look at this!
That's one sexy recovered roller.
I've been experimenting with producing my own rubber parts of late, and it nicely payed off with this typewriter. I'll blog on this in the near future.
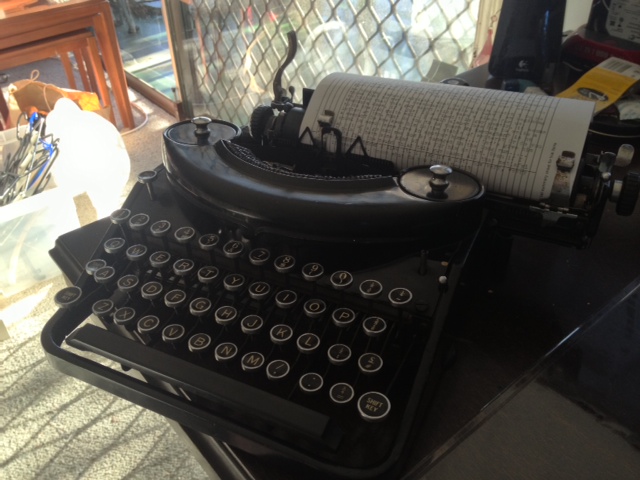
The machine now works. It still has some problems to resolve, but it is now a largely working example of a Remington Noiseless. When I showed it operating to the long-suffering Ms Jane, she exclaimed "Wow! It's silent. Feel free to type with this one anytime".
I suspect she was hinting that my typewriters are noisy.
I think I have hit the boundaries of what I fix on this typewriter at this stage. But it has shown me that I have learned quite a bit since I started toying with these machines, and I am learning quite quickly - while coming up with some great solutions to problems I'm often facing.
I also hope that Michael finds something here that can help him. Best of luck Michael!